This tool is free to download and use, but you can use them only
for non commercial project or scenarios. All the source code is original and has
been made by me alone, and I retain the rights to the software and source code.
However, if you like it and want to support me, you can make a
donation via PayPal. Making this editor is a long and hard work, and your
support will help me finishing the remaining pages faster, and then expand the
editor to new features.
This new editor is for Civilization III conquest with the latest patch. It
doesn't change anything in the game play, as I don't have access to the source
code of the game itself. The purpose is to make modding easier, by adding
management tools to the existing editor (like reorder, alphabetical sorts), and
also tools to help tracking errors.
Before anything, I'd like to thank Gramphos, whose Copy tools
gave me the idea to make this new editors, with improved features. His
description of the biq format available at Apolyton has been very helpful to get
started, and his kind answers to my email allowed me to understand a few points
I couldn't get.
Also, a special credit to Sandris. All these new wonderfull
units where fundamental to give me the motivation to undertake such as task!
Firaxis and 2K games are the developpers/owners of the right to
Civilization III, but they have not been involved in any way in the development
of this expanded editor.
Note: buildings have a "CanBribe" flag, but in the sample I've
used, it's always set to "false". However, it doesn't seem to prevent propaganda...
So I'm not sure what is the real effect of this flag.
It means the only remaining pages are buildings, governments,
and terrain.
This tool is still under development. So not all the pages are
done.
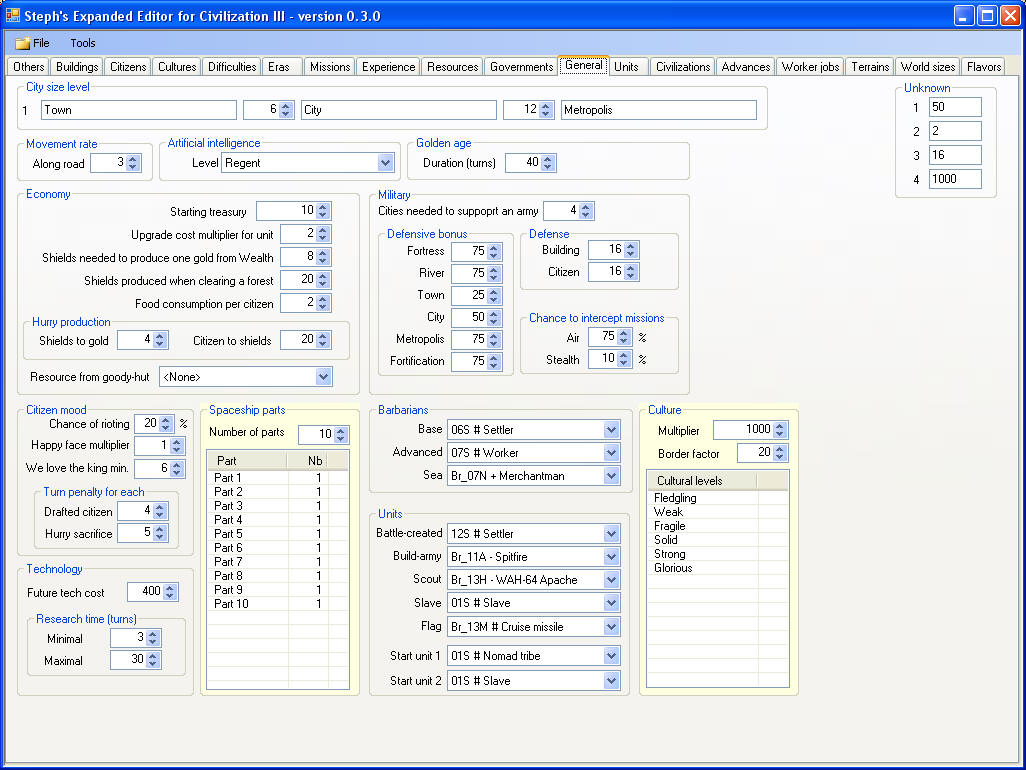
Parts with a yellow background are readonly: the info from the
file will be displayed, but editing has no effect.
To explain how the tool works, let's see it page by page.
|
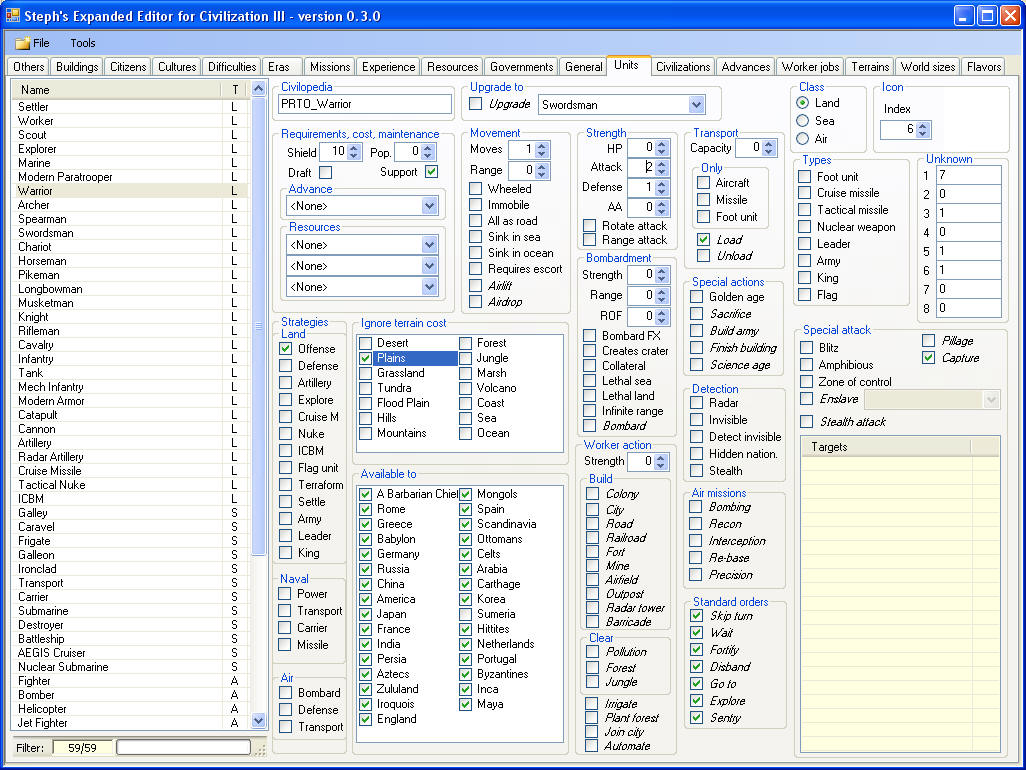
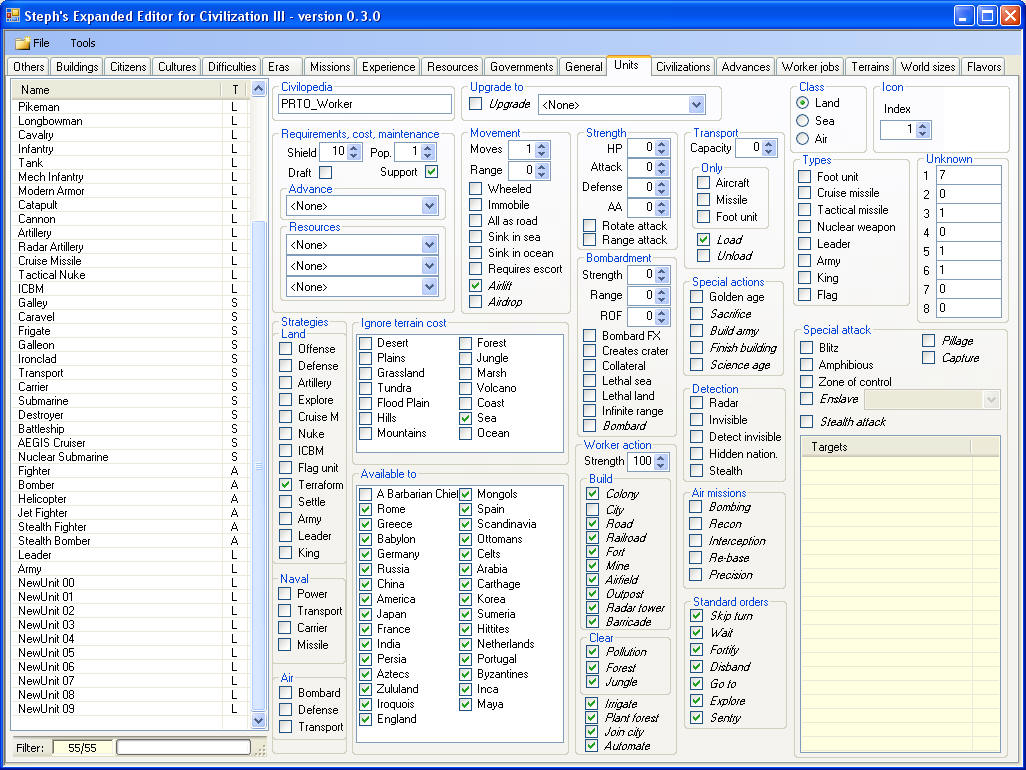
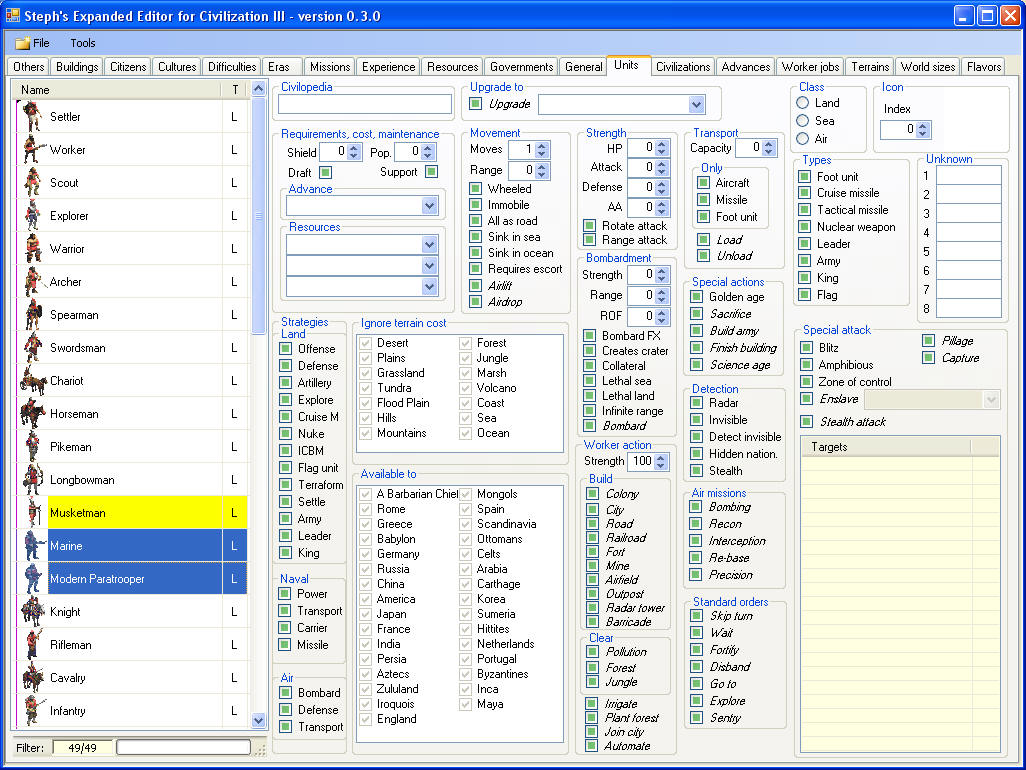
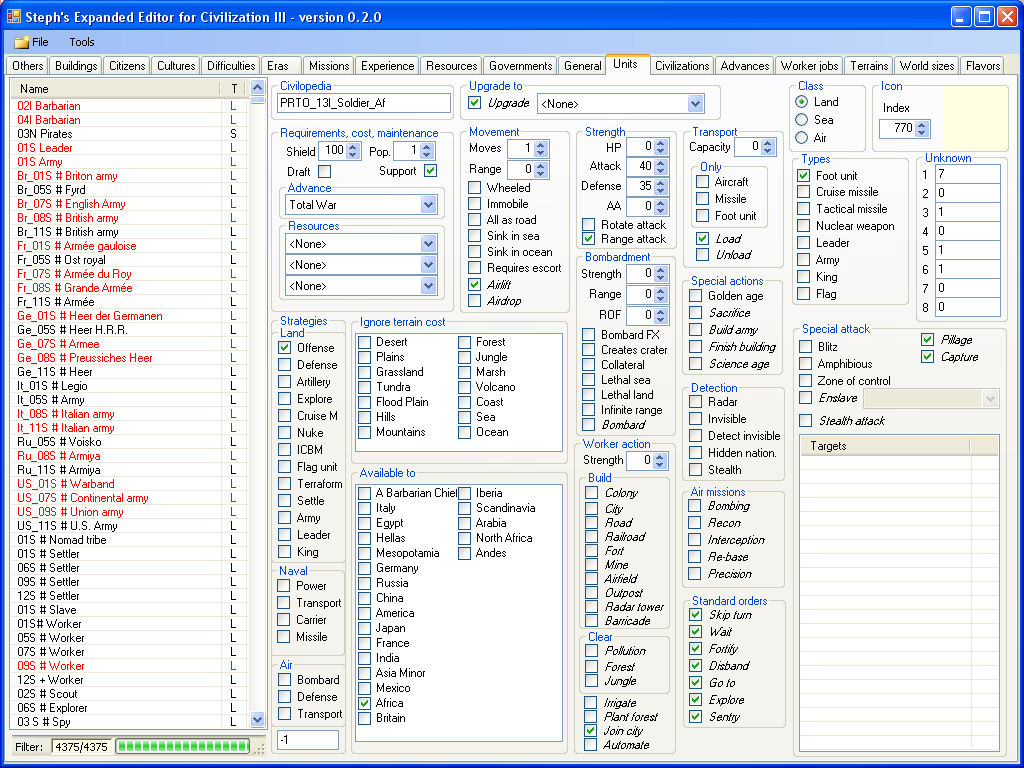
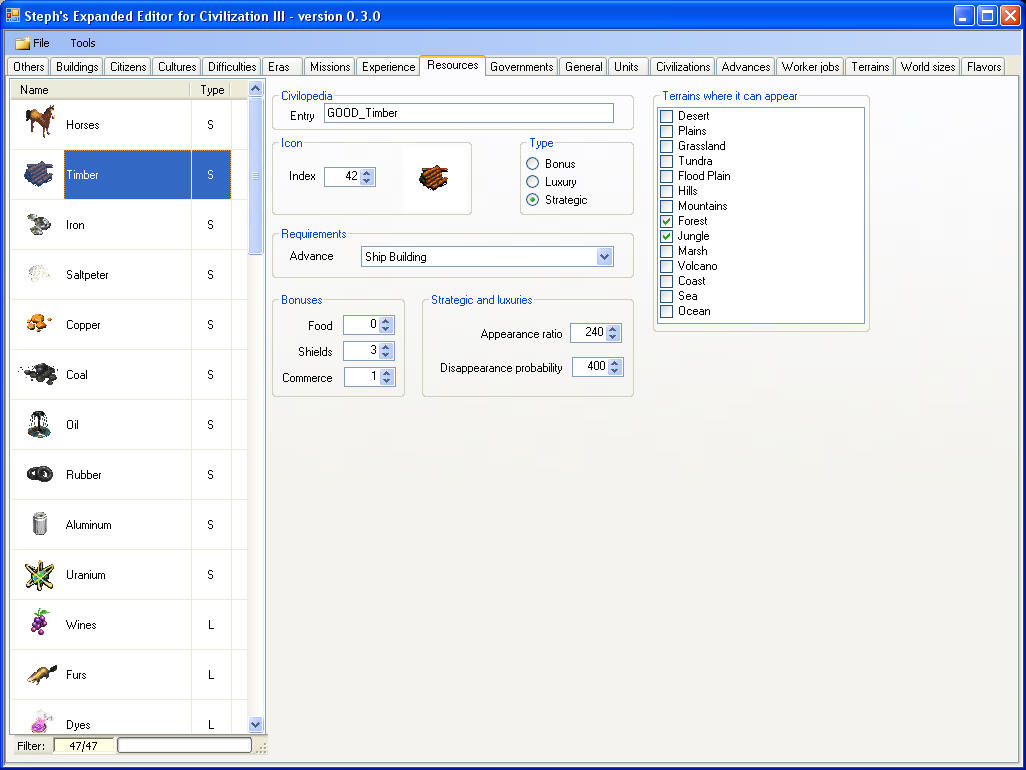
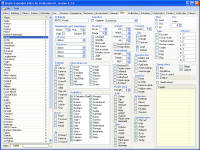
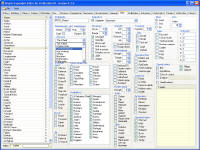
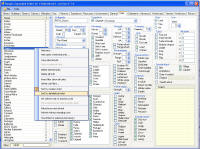
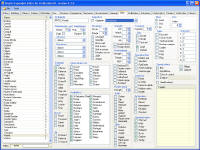
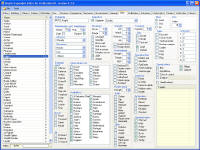
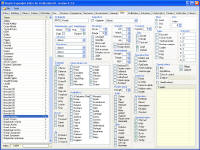
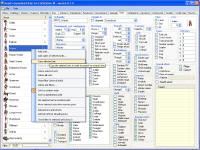
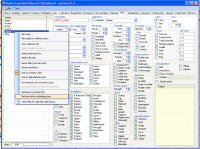
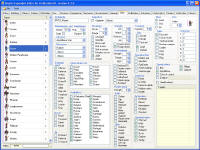
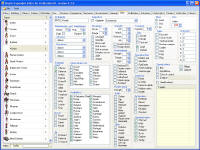
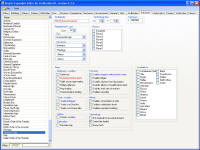
Click on the Units tab to display the units. The left list contains all the
units, with a letter (Land, Sea or Air) in the T (type) column. They are
initially in the "creation" order (ie the order they would appear in the
regular editor).
A the bottom, the status bar indicates how many units are listed.
As no unit is selected, all the controls in the right area are disabled. |
|
|
|
Editing the units |
|
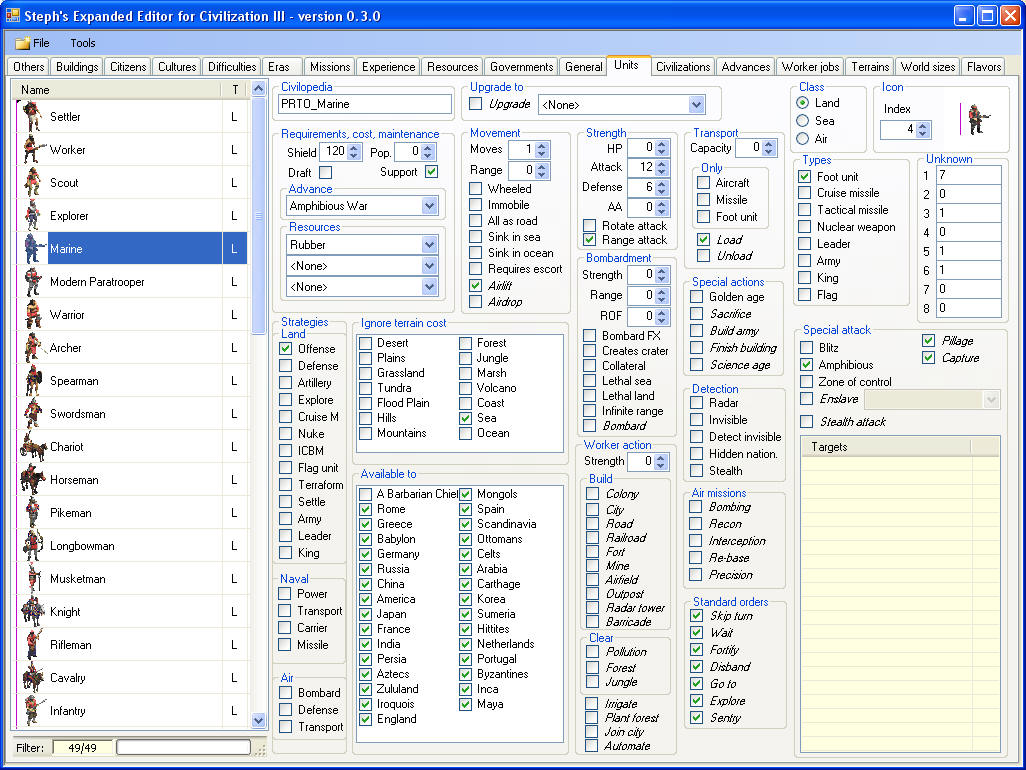
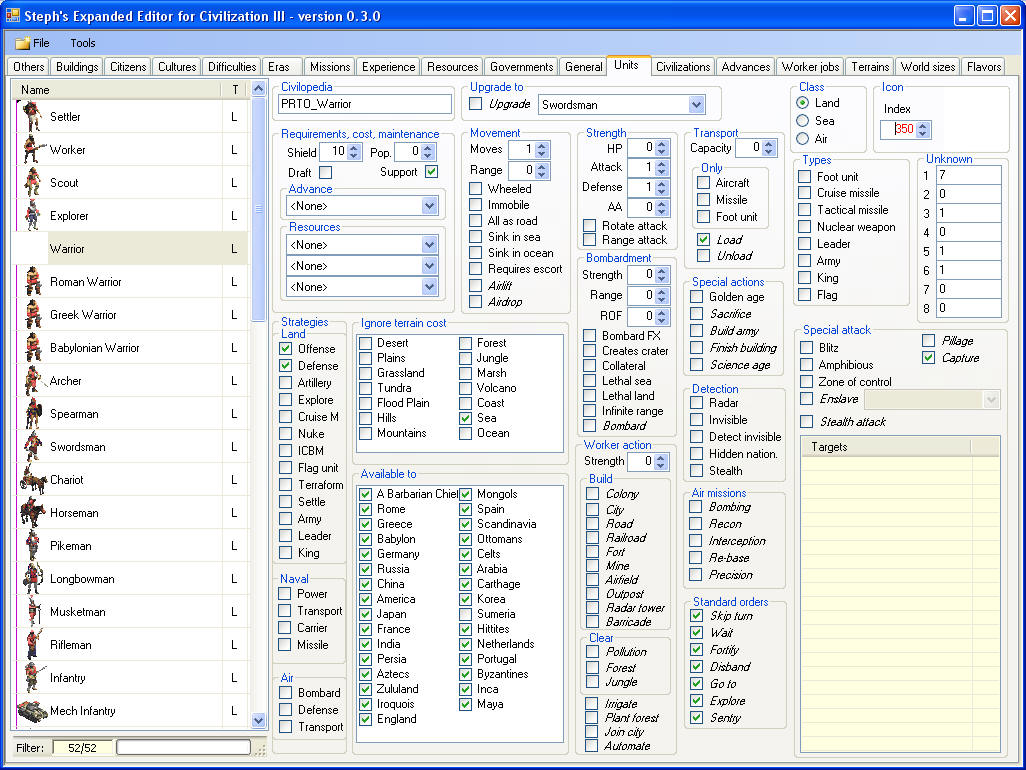
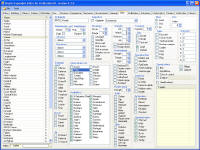
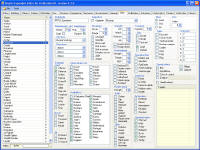
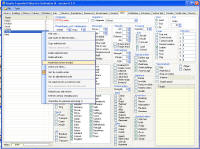
When you click on one unit in the list, its parameters are listed in the
controls on the right. Then, you can modify parameters for the selected
unit, by clicking on the different controls and changing the values directly. |
  |
|
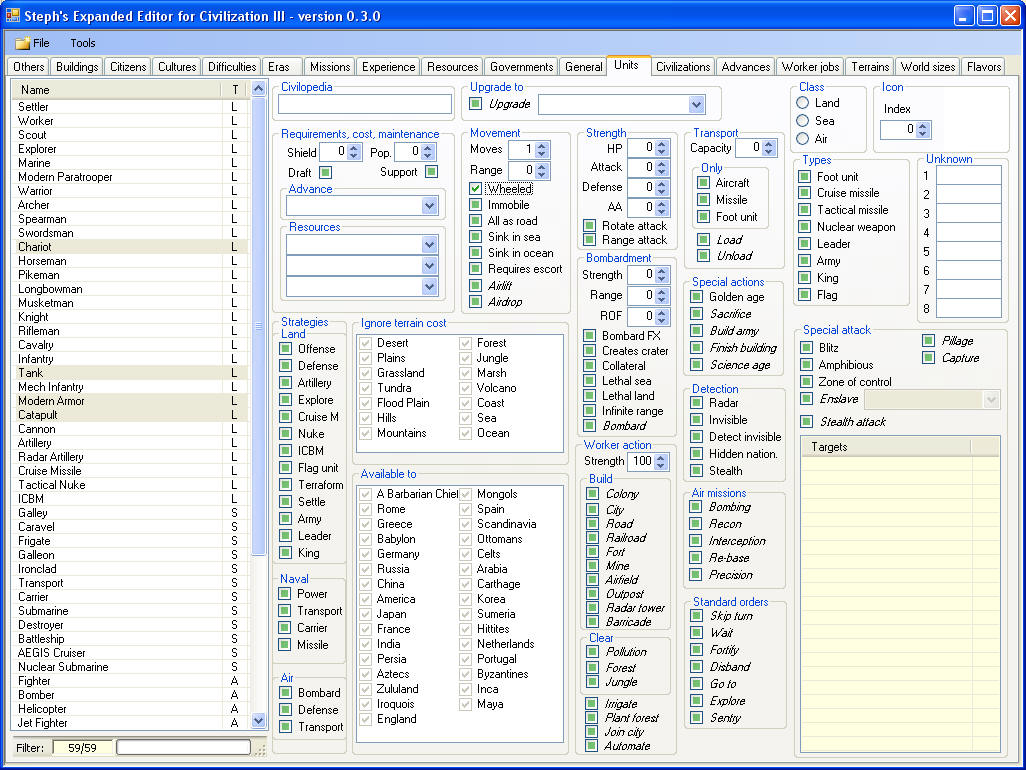
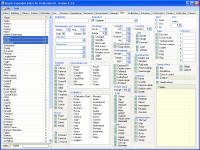
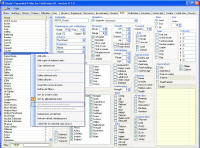
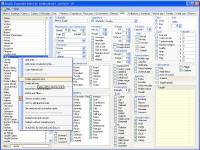
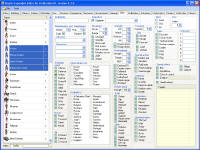
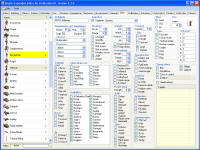
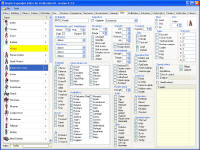
You can also select several items. In that case, the controls appear
initially as "indeterminate". While several items are selected, you can
modify the parameters. Doing it will apply the change, for these parameters,
to every selected unit. In the example on the right, I've selected the
chariot, catapult, tank and modern armor, and I have made them all wheeled
units with one click. |
  |
|
|
|
Renaming a unit |
|
To rename a unit, select it in the main list, and then click (like to rename
a file in Windows explorer). Do not double click! If the name is to long,
it will be automatically shortened to the maximum length. It is not
mandatory to have unique names. |
 |
|
Sorting the units |
|
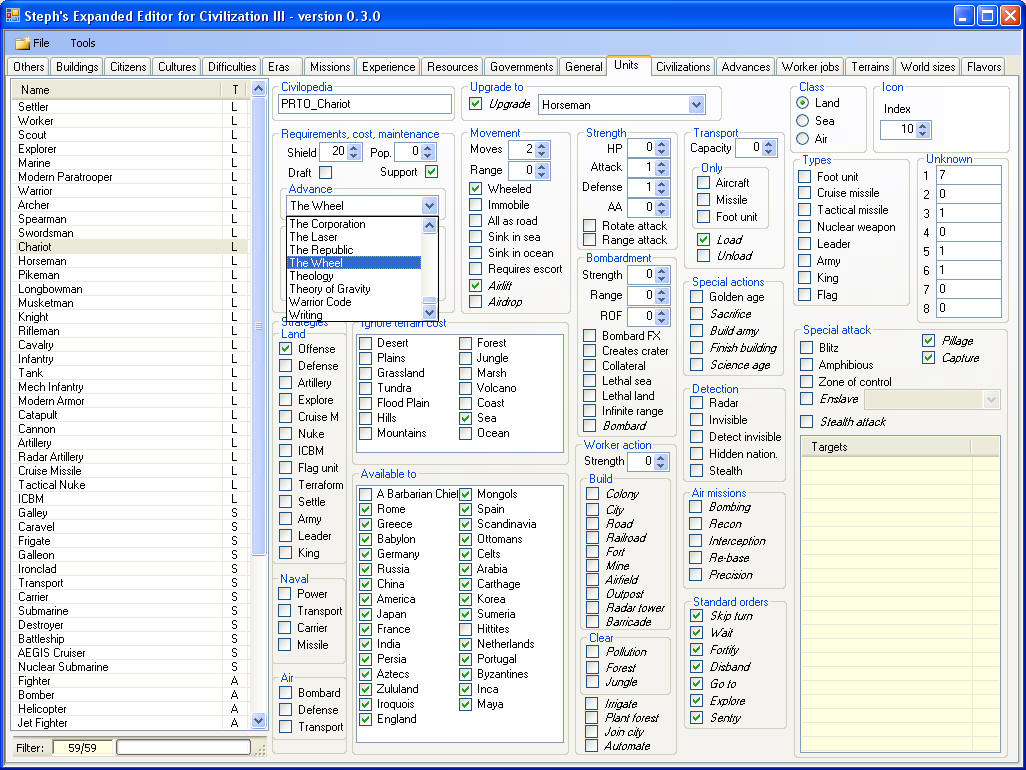
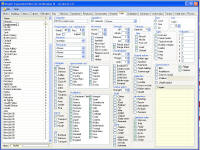
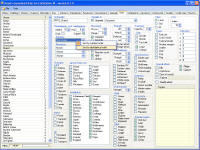
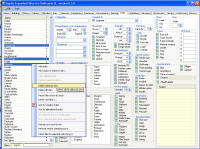
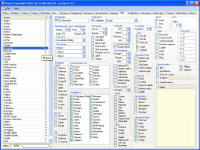
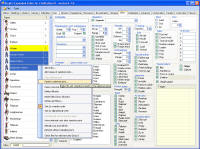
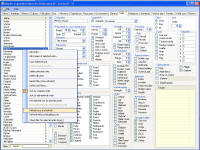
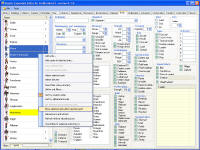
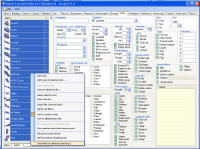
By default, the items appear in the dropdown list in the order they are in
the regular editor (the "creation order"). If you took time to order the
items correctly when creating them, it's sometime easier to organize. But
most of the time, it's just difficult to find something in these lists. So
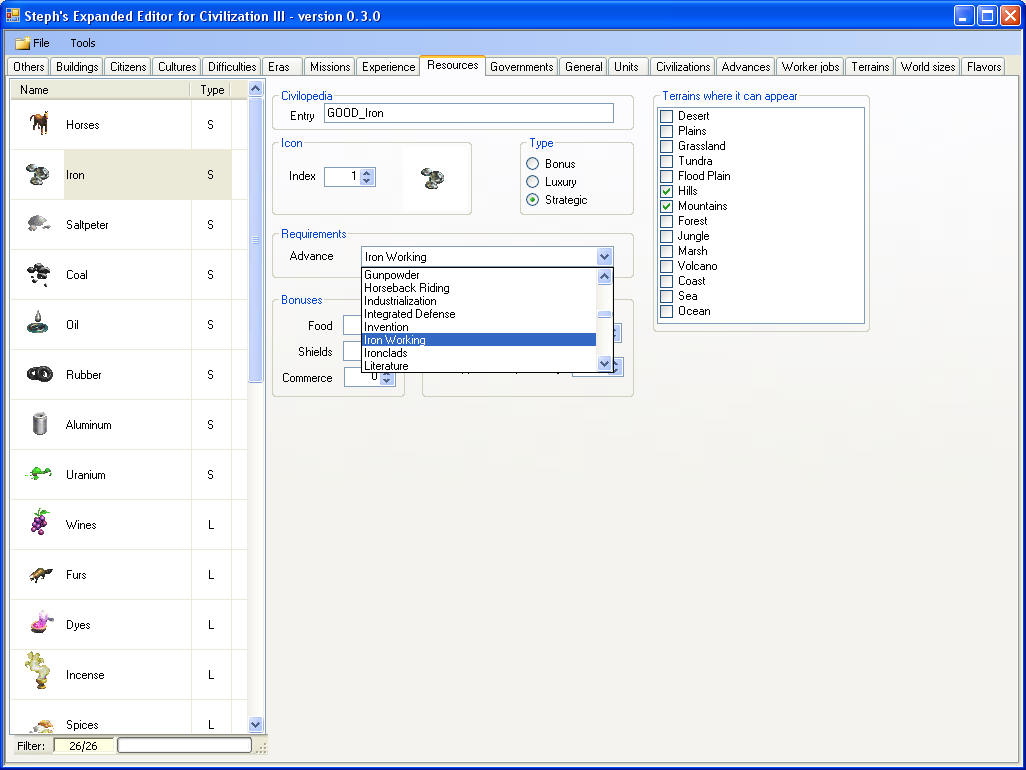
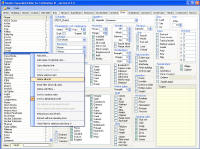
you have an option to display them in the alphabetical order. To do this,
right click on one of the dropdown list when it is closed, and select the
sorting order in the contextual menu.The items are immediately reordered.
The sort option is applied to ALL the dropdown lists of the same type. In
the example below, I have reordered the advances in alphabetical order in
the unit page. If I can to the resource page, advances will also be in
alphabetical order.
Warning: if you reorder some items, like units, with a lot of entries,
and lot of lists (because of the general settings), it can take a few
seconds. |
    |
|
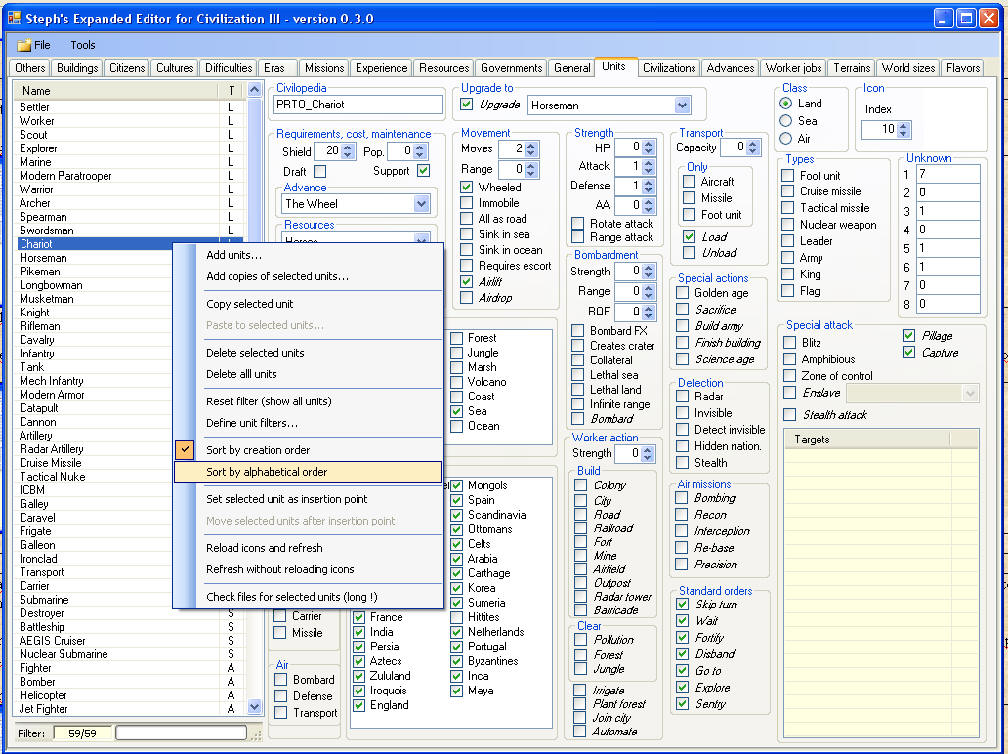
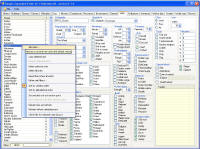
You can also sort the items in the main list. For this, right click on the
main list, and select the sorting option that you want. Warning: some
functions, like the reordering of items, are available only in the main list
is in creation order. |
  |
|
Deleting units |
|
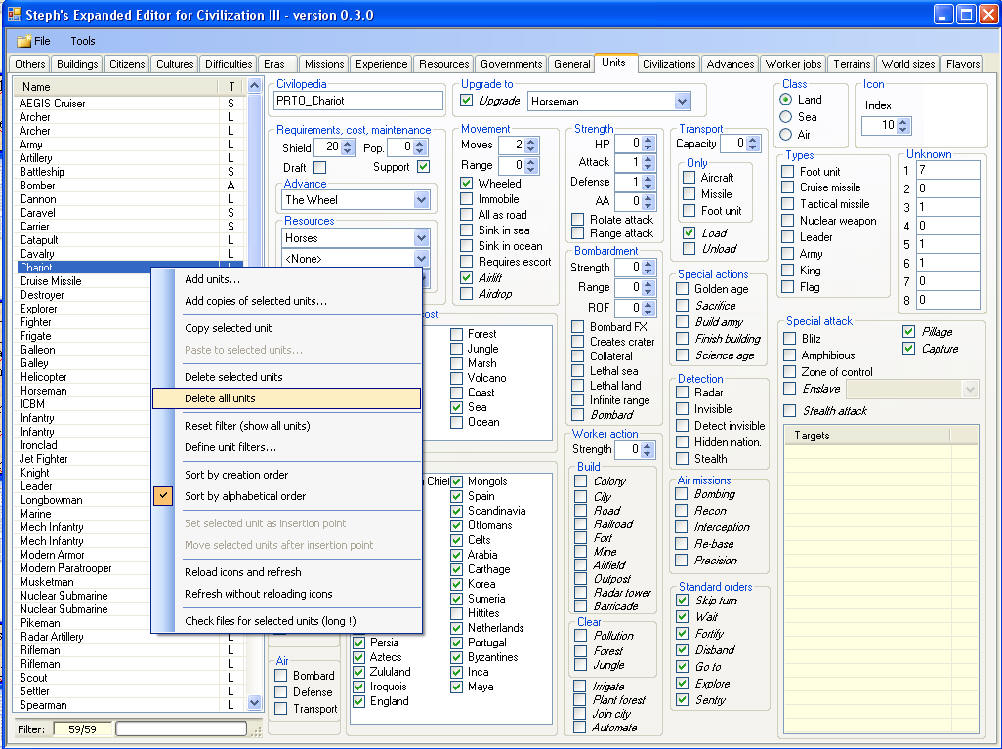
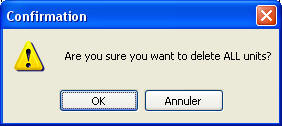
If you want to start clean, you can easily delete all the items. Just use
the Delete All command in the contextual menu (right click on the
main list). You need to confirm, and then you'll have an empty list. |
   |
|
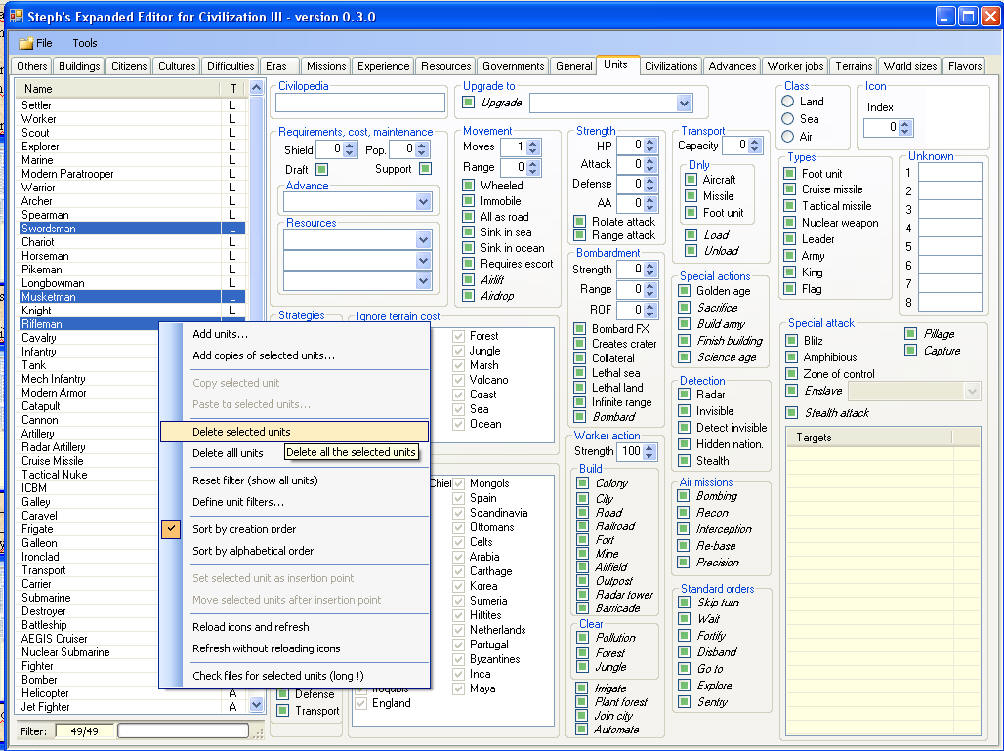
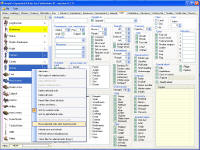
You can also delete only some units. Select the units you want to delete (using
CTRL or SHIFT for multiple selections), and then select the Delete
Selected units command in the contextual menu (right click on the main
list). You need to confirm, and then the units are removed from the list.
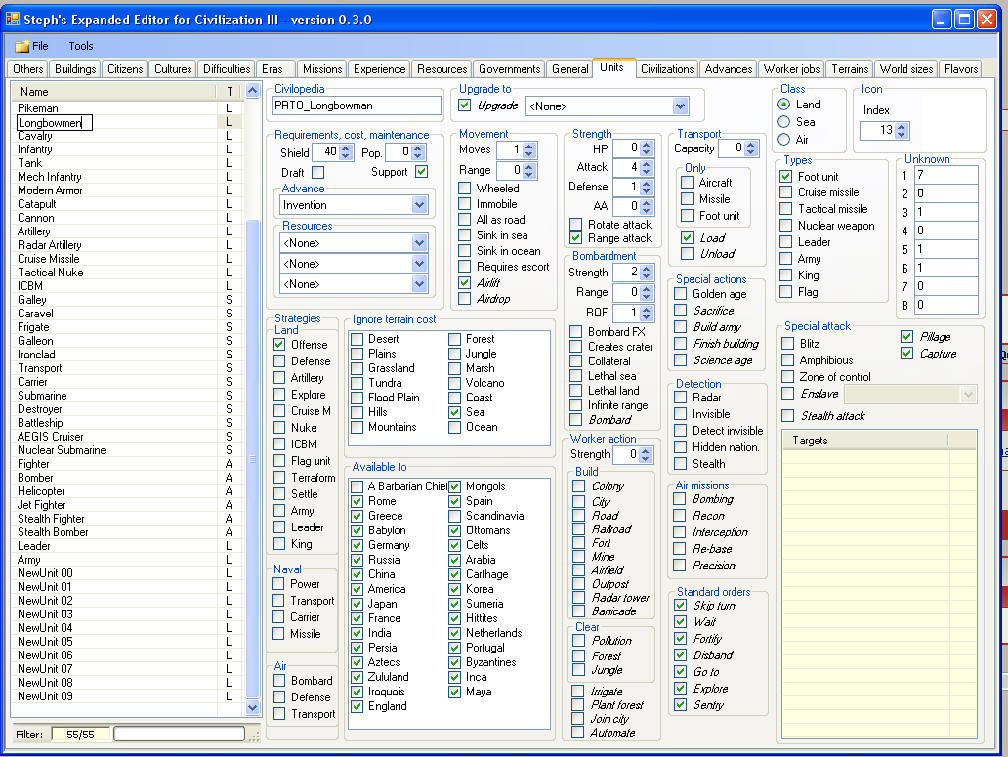
Alternatively, instead of using the contextual menu, you can press the
Del key after you have selected the units you want to delte. All the
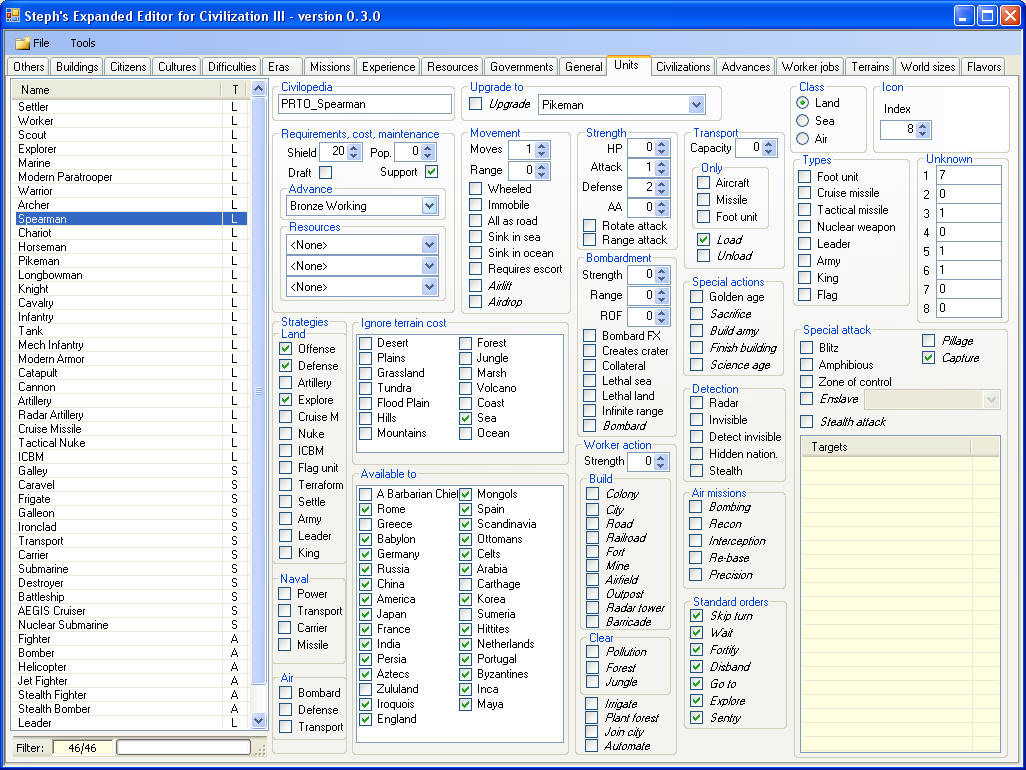
other items are updated to take the deletion into account. Here, the warrior
initially upgrades to the swordsman, and the spearman to the pikeman. After
the swordsman has been deleted, the warrior upgrades to none, and the
spearman still upgrades to the pikeman (the "gap" created by the deletion of
the swordsman is correctly taken into account). |
     |
|
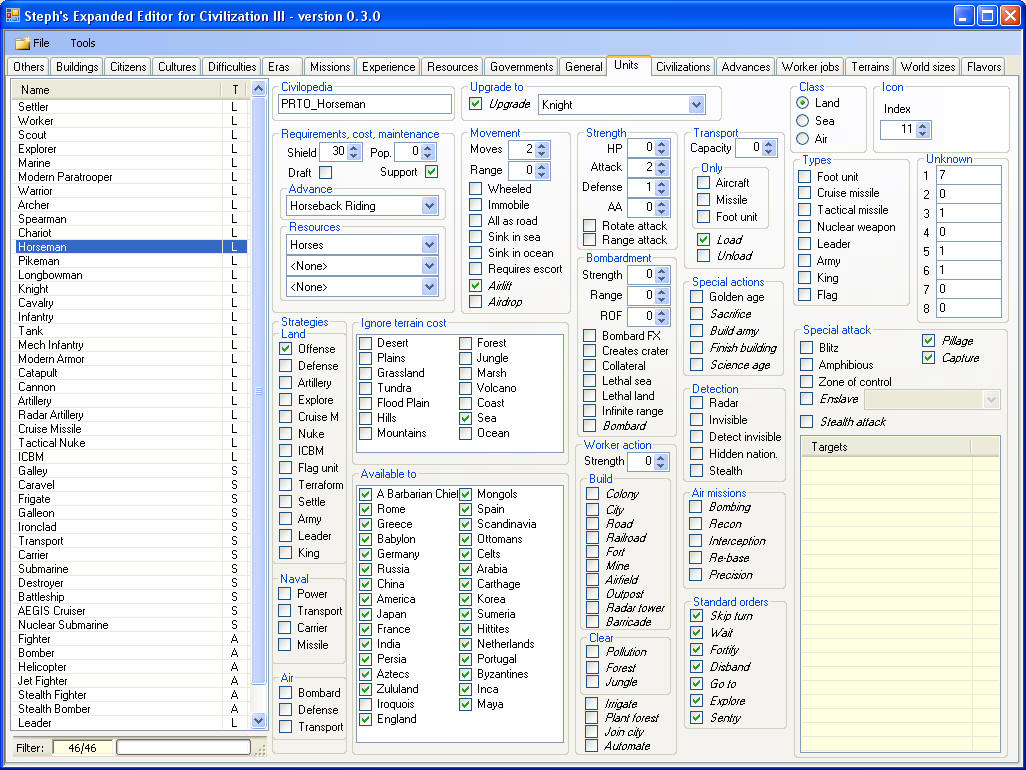
Transitive upgrades are preserved. Here, the horseman upgrades to
the knigth, and the knight to the cavalry. If I delete the knight, then the
horseman will automatically upgrades to the cavalry. |
    |
|
Adding units |
|
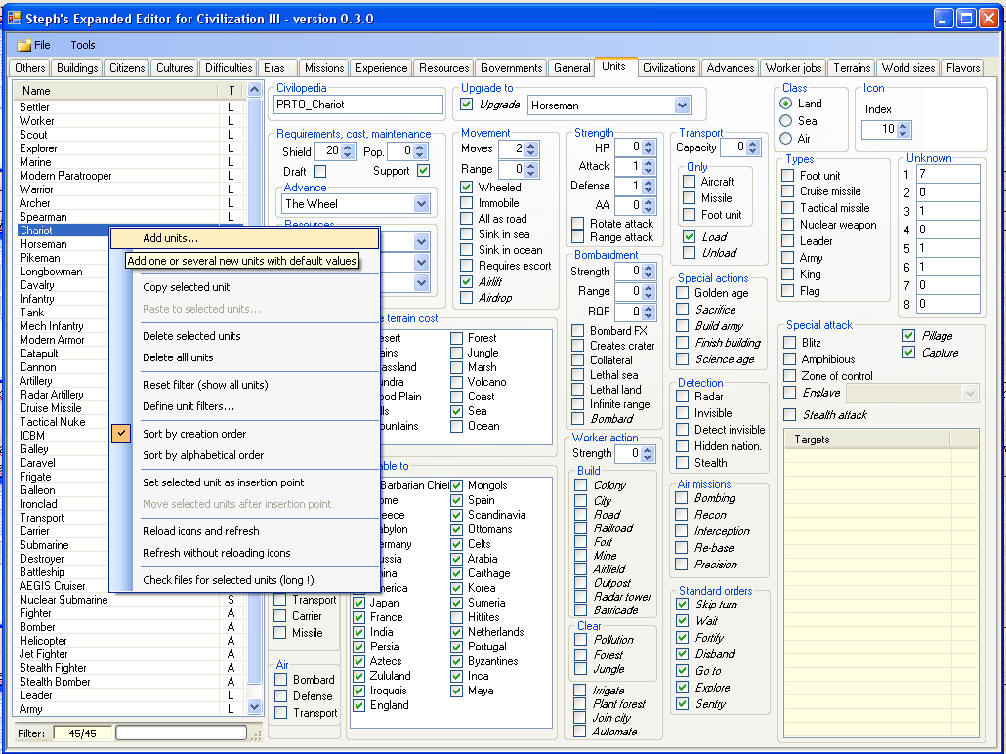
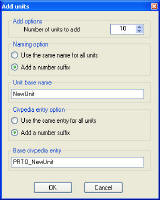
To add new units with "default" parameters, rigth click in the main list,
and select Add units... The "Add units" window is opened. Select
how many units you want, and what should their name be. You can use the
exact same name for all, or ask to add a suffix to the name.
|
   |
|
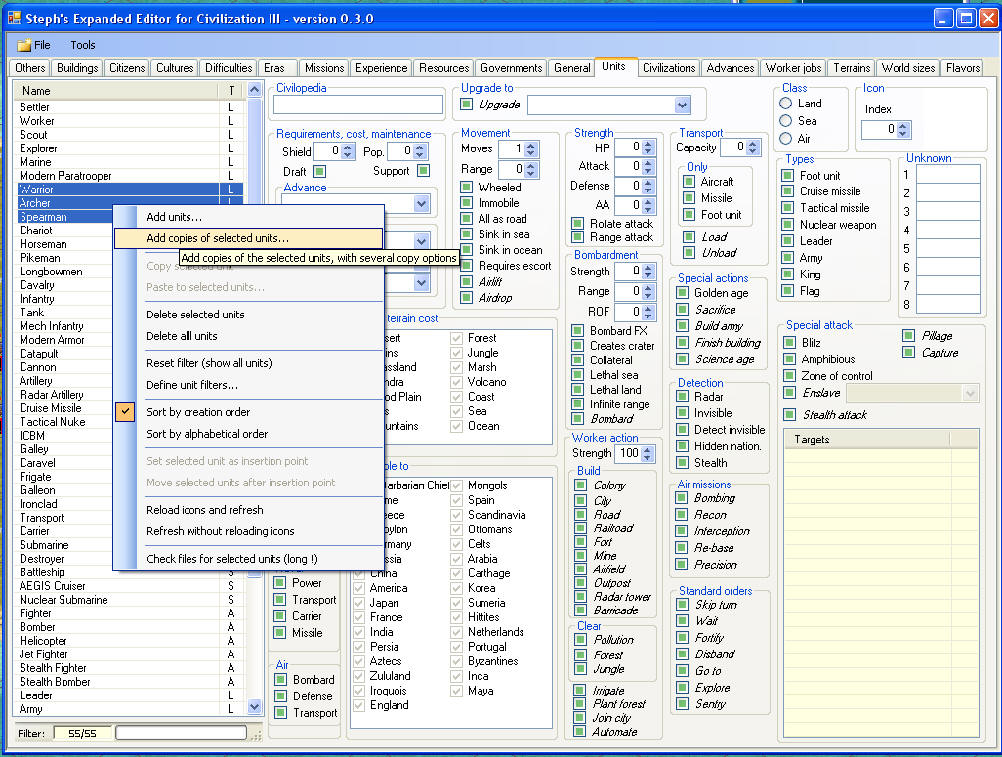
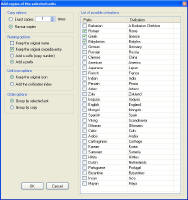
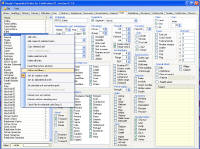
You can also add copies of one or several existing units. This is very
useful to get flavour units. To do this, select the units in the main list,
rigth click on one of them, and select Add copies of selected units...
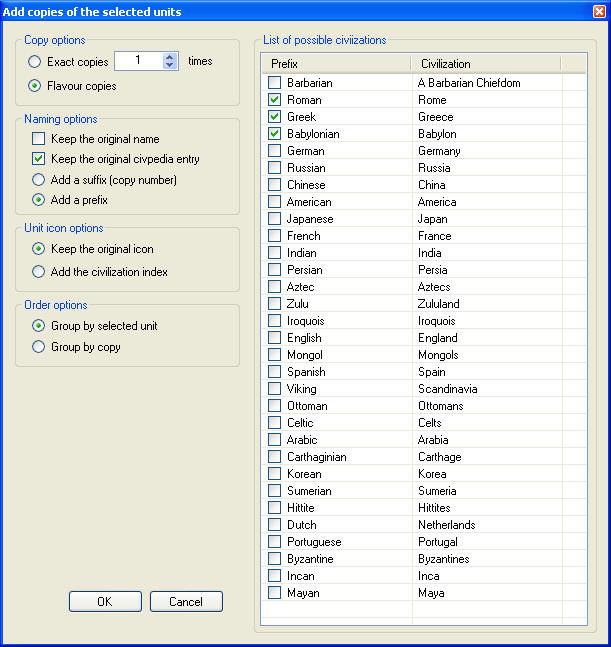
You then have several options. First, you can specify how many copies you
want, or request one copy for each civilization (as in the screenshot below).
You can keep the same name, add a suffix (number), or add a prefix. To set
the prefix, you can edit the list on the right.You can also decide to keep
the oriignal icon, or to add to the icon the index of the civilization.
It's also possible to decide how you want to group the units (in what
order they are added.
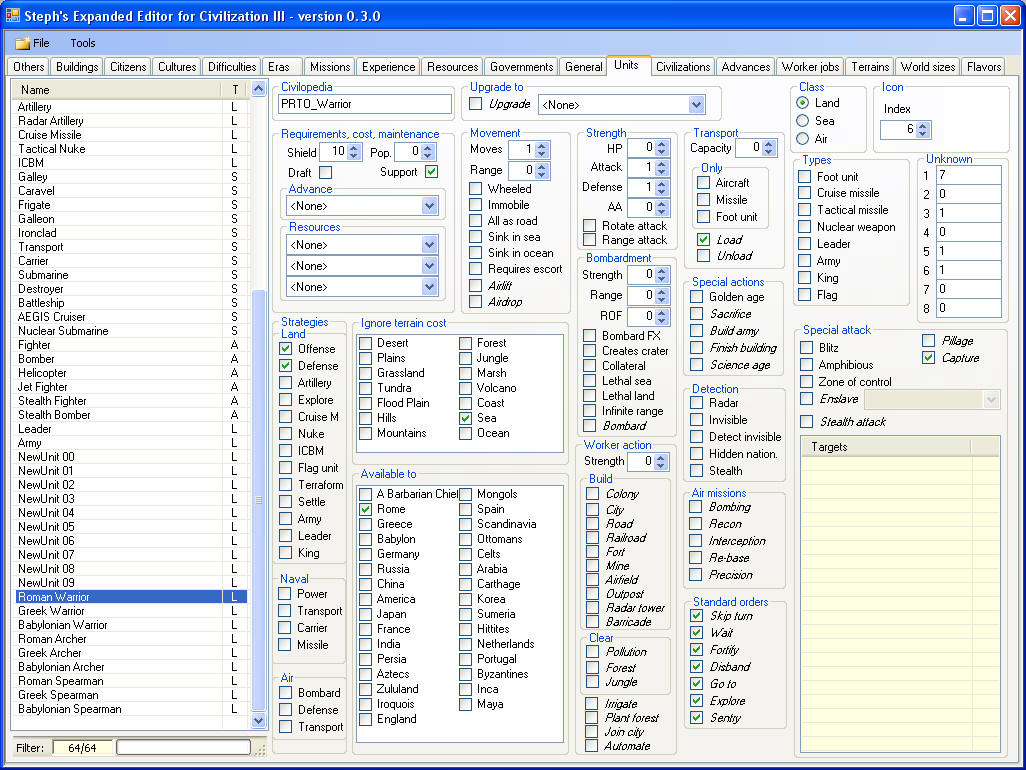
In the example below, I want to add flavour units or the warrior, archer,
spearman for Rome, Greece and Babylon. I want to use the adjective as prefix.
I get as many copies as I have selected civilizations, and they are
automatically limited to this civilization. Very convenient for flavour
units! |
   |
|
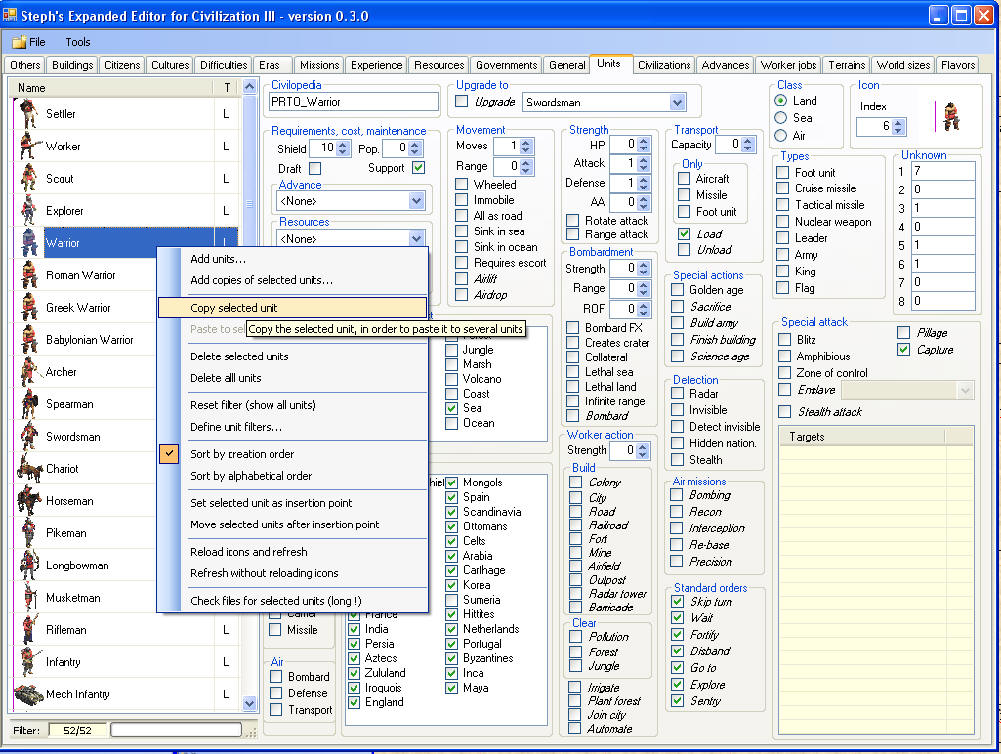
Copying units |
|
Sometimes, you have an existing mod, with many flavour units. Like in the
screenshot below, 3 flavour versions of the warrior. But then, you want to
change something in the warrior for balance purpose. And you'd lilke to do
the same change to the other warriors. The first possibility is to select
the 4 of them, and then to edit. Every change will be applied to all the
selected units. Or you can first select the warrior, right click on it,
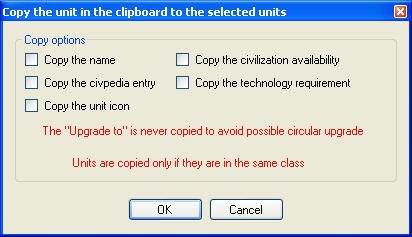
and select the Copy selected unit command. Then select the 3 flavour
units, right click and select Paste to selected units... Select the
copy options. By default, all the parameters are copied, except the name,
civpedia, icon, available civilizations, and technology requirement, but you
can request to copy them as well. |
    |
|
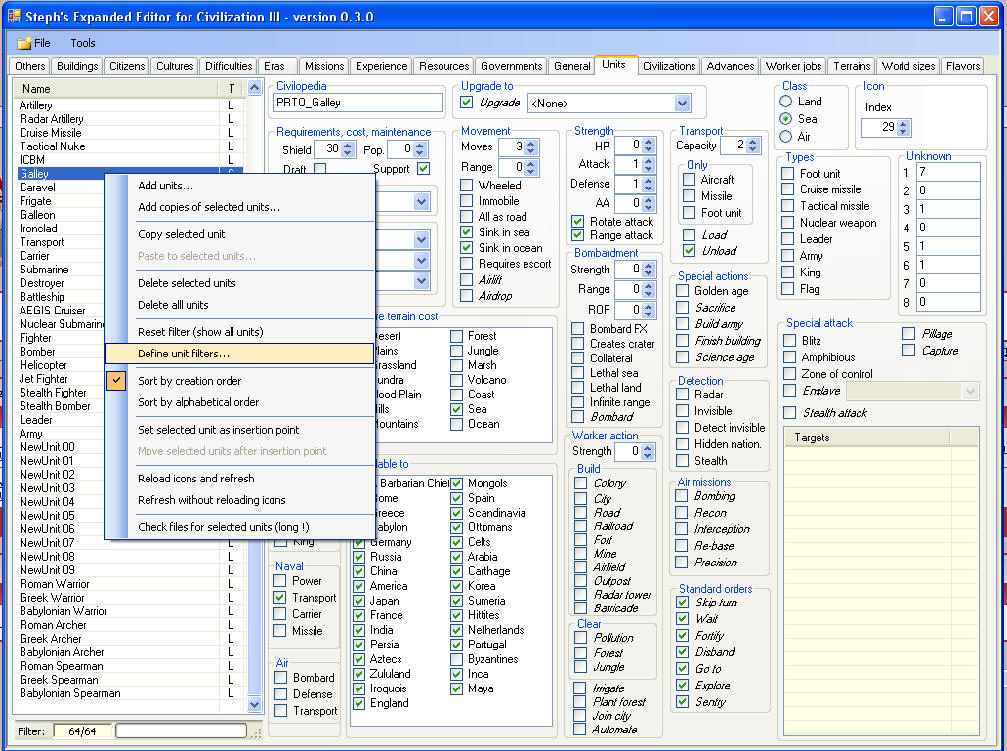
Filtering units |
|
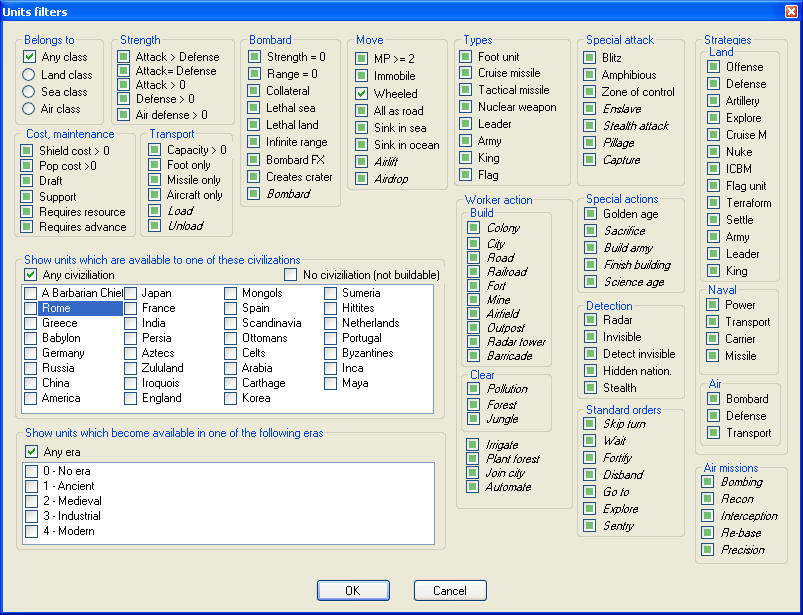
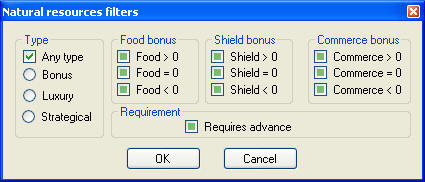
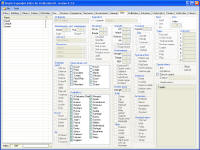
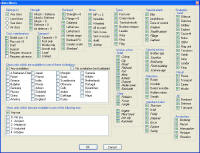
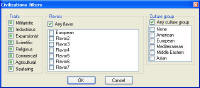
If you want to limit the list to some units, you can define a filter. Rigth
click in the main list, and select Define unit filter... In the
filter window, you can combine as many options as you want. For checkboxes,
a big square green means "indeterminate". These parameters is not used as a
criteria. An white empty square means the unit will be included in the list
if the flag is not checked (on) in the editor. And a green check means the
unit will be included if the flag is not checked (off) in the editor.
The first example shows only the unit with the Wheeled flag. You can also
restrict the units to a specific civilization, or era.
Using the "Require advance" filter, you can see what unit is buildable
from the start.
After tha flag has been applied, you can see the number of displayed
units / total units in the status bar at the bottom of the window. If you
open the filter window again, the last filters are displayed again. |
    |
|
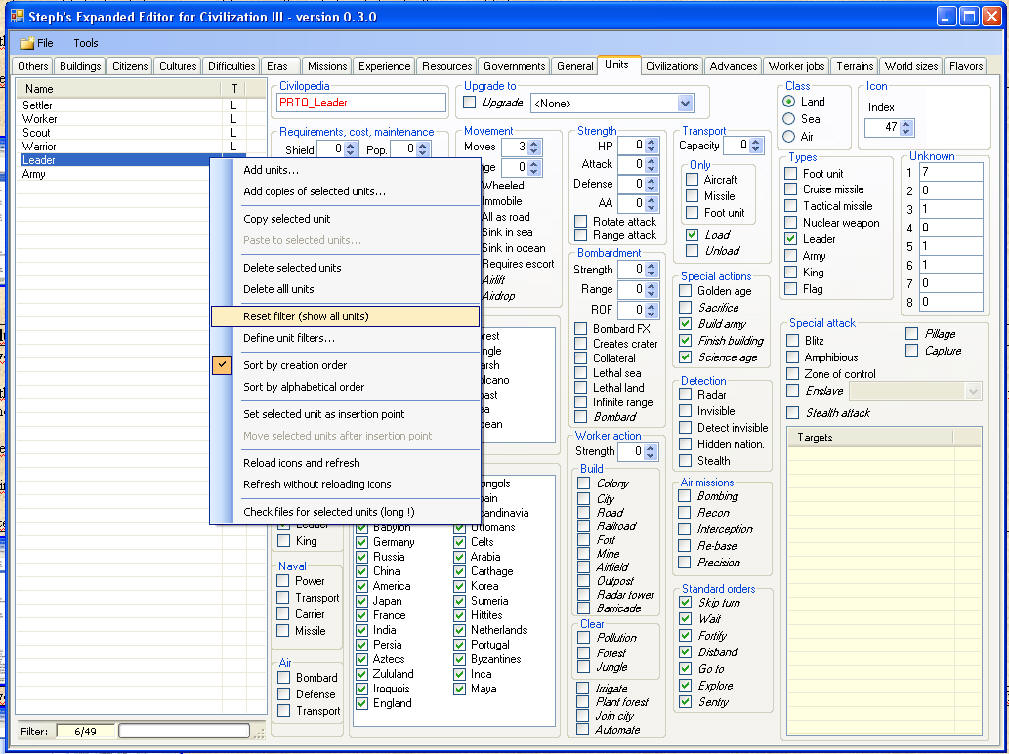
If you modify an item, it will not disappear from the main list even if
after the change it doesn't match the criteria, until you open the filter
window and apply it. Or select the Refresh command in the contextual
menu.To show all the units again, select the Reset filter command in
the contextual menu |
  |
|
Adding the icons |
|
For units, loading the icons can take some time if the unit_32.pcx file is
big. So they are not loaded by default. To load the icons, select the
Reload icons and refresh command in the contextual menu. |
  |
|
Changing the "creation" order |
|
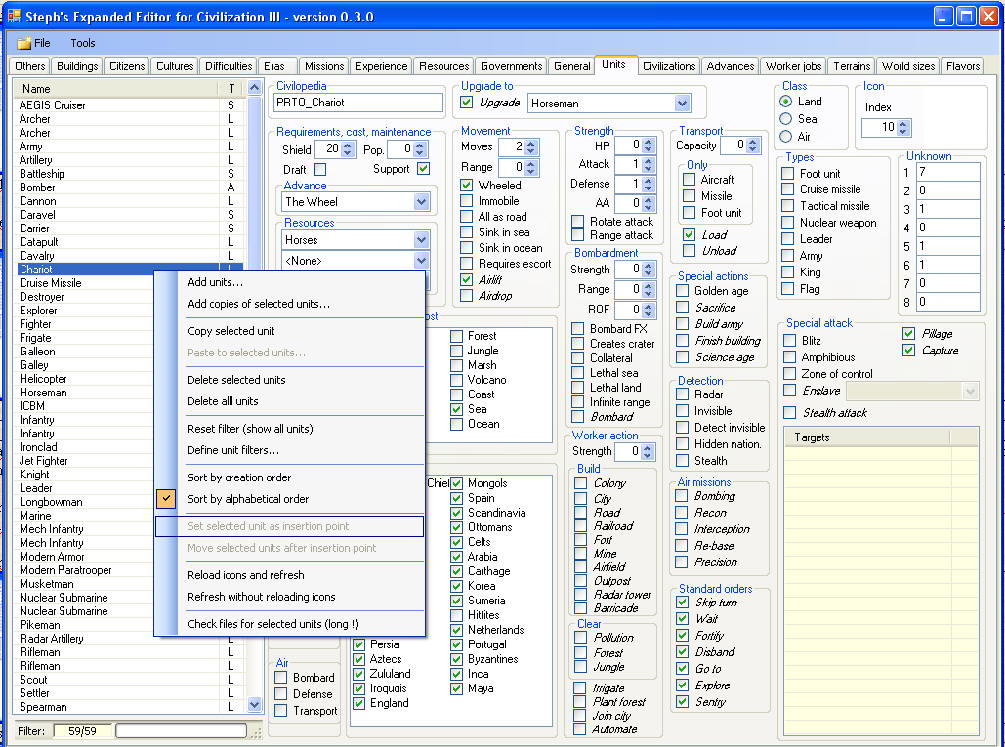
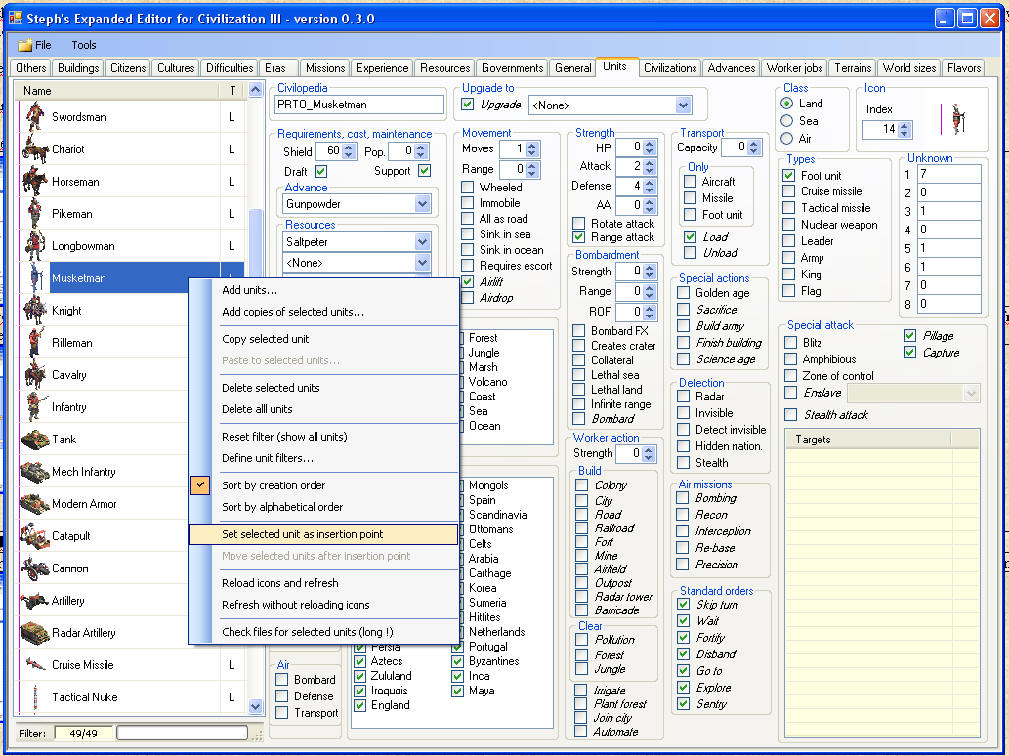
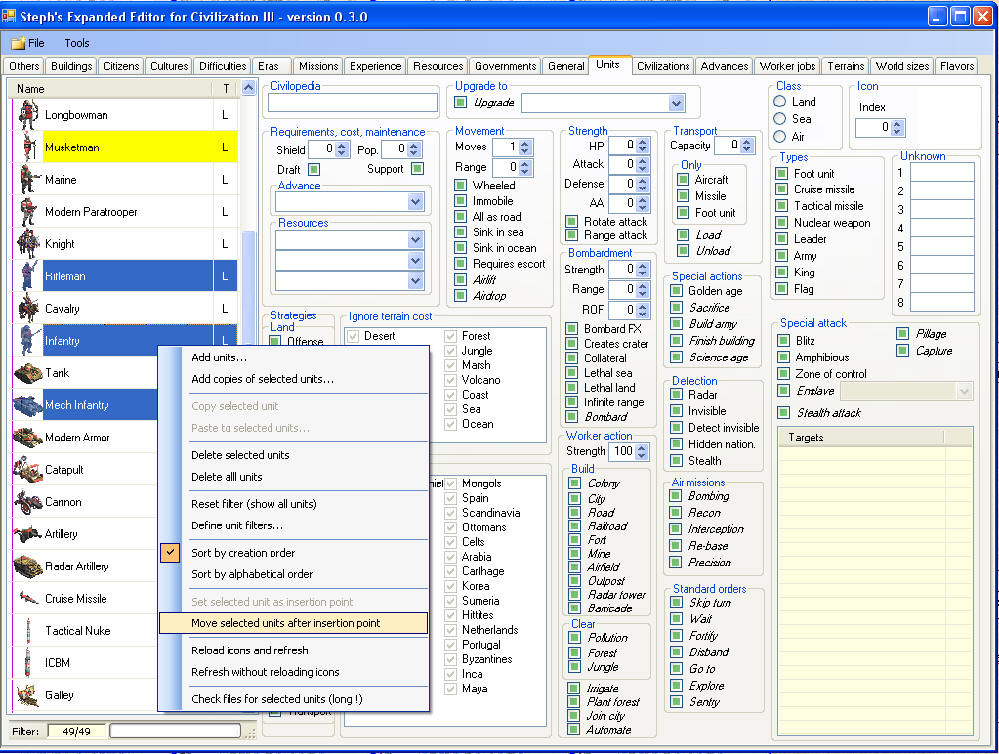
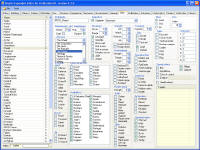
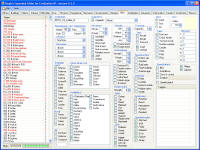
If you want to reorder the units, first you need to be sure you are using "Creation
order" sort, as "Alphabetical" sort disables the command. First, select a
unit that will be the insertion point (the units will be moved just after
this "insertion point unit"). Then, right click on this unit, and select. In
the example below, I want to move some units just after the Musketman. The
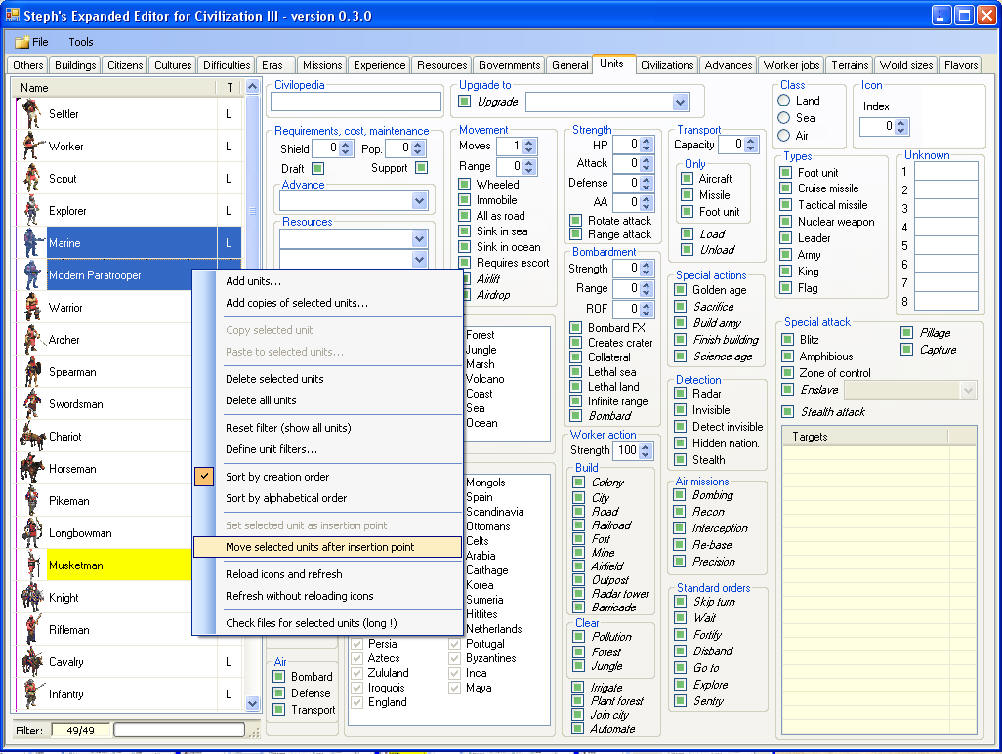
"Insertion point" is marked with a yellow background. Then, select all the
units you want to move after the insertion point, right click on one of them,
select Move selected units after insertion point in the contextual
menu. The selected units are moved just after the Musketman, keeping their
initial respective order.
As the insertion point is not reset, you can quickly repeat the process.
The units you want to move don't need to be adjacent (see last screenshots) |
      |
|
|
|
Checking for errors |
|
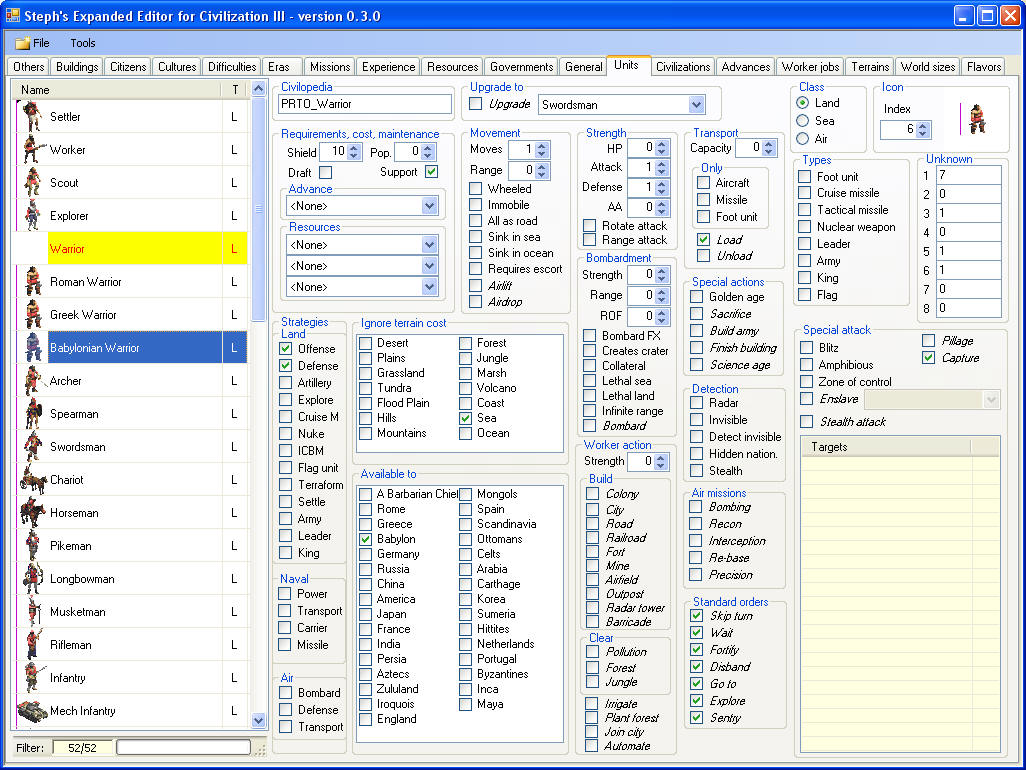
If you set a unit icon greater than the current unit32.pcx file, the unit
icon is displayed in red. And if you select another unit, the name in the
list is highlghted by a red color. So you know you have something to chec. |
  |
|
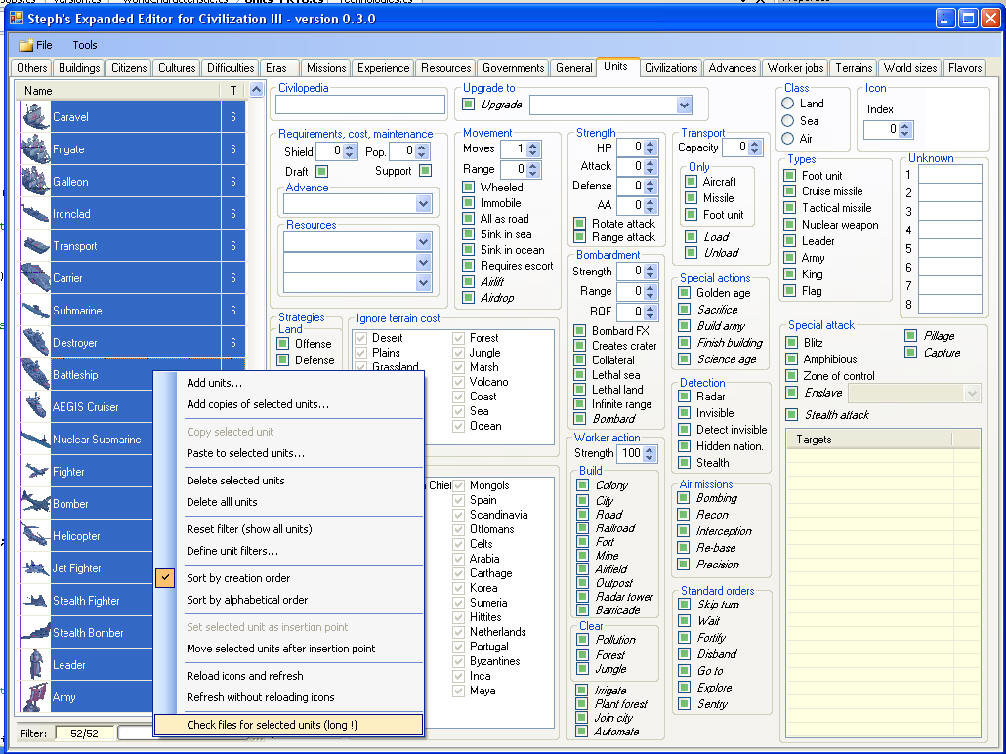
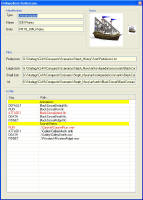
One of the most tedious task of mod making is tracking errors in the
civpedia. To help you with this, you can select the units you want to check,
and then right click on them, and select the Check files for selected
units command. The process can be a bit long with many units, so be
patient.
At the end, every unit that has an error in the file is listed in red. |
  |
|
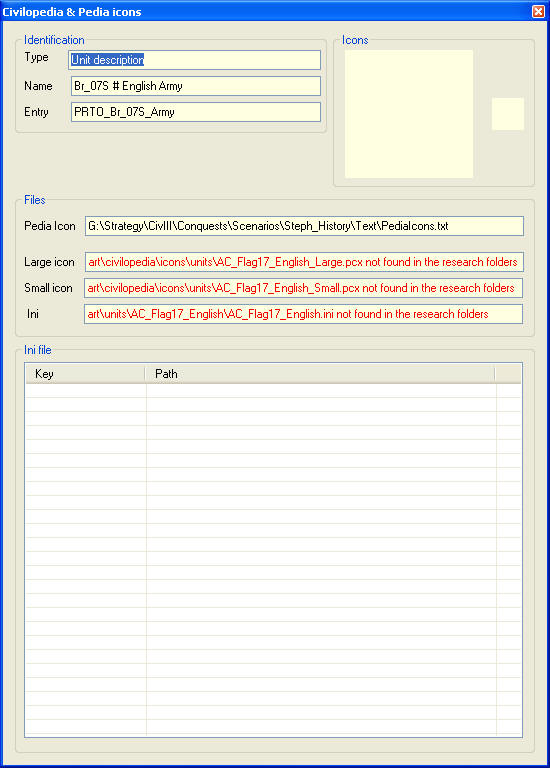
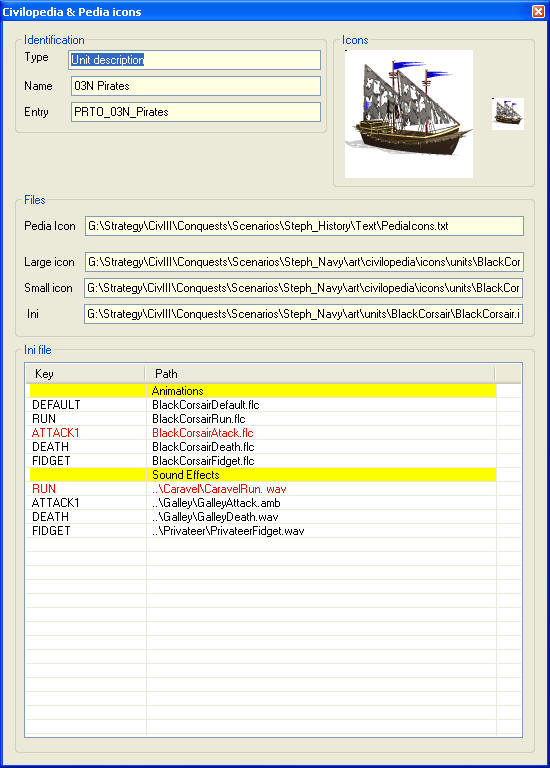
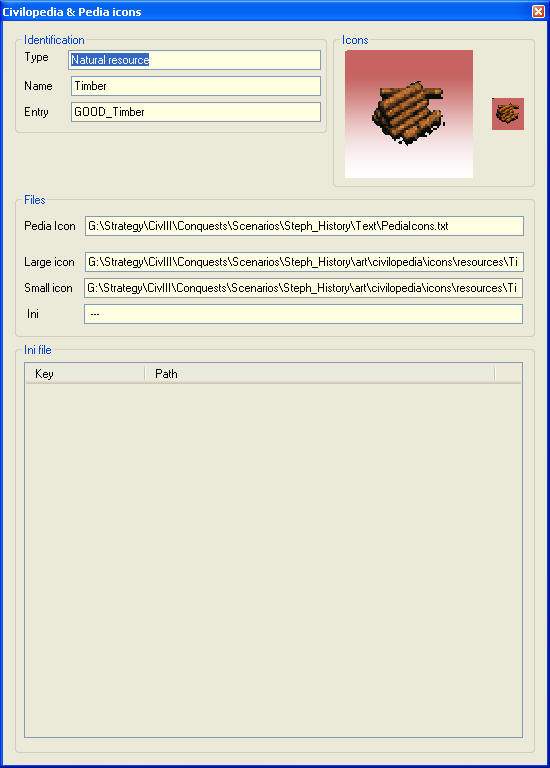
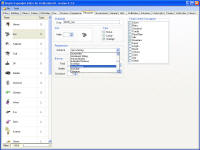
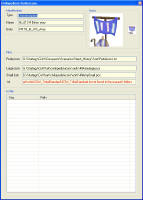
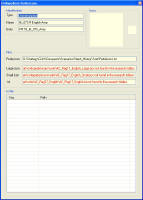
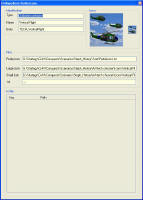
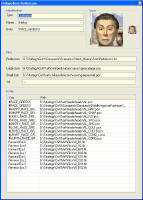
To know more details, use the Tools \ civpedia and icon command in
the main menu, to open the Civpedia windows. When you select a unit in the
main list, in the Civpedia window, you get the files as they are defined in
the PediaIcons.txt file or ini files, taking the scenario research folders
into account. Errors are identified in red. To correct the error, you can
edit the PediaIcons.txt file, save it, and then select again the unit in the
list (you don't have to reload the scenario).
Warning: My editor doesn't take a few things into account, like
having era specific entry. So it may detect some errors which are not real
errors. |
    |
|
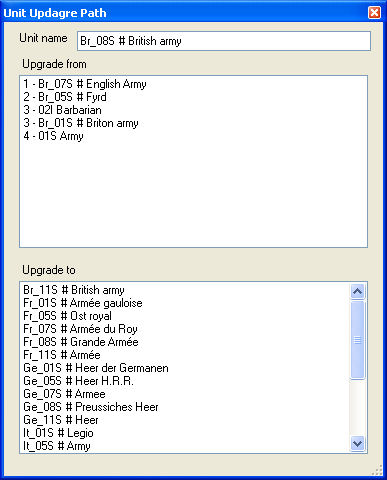
The upgrade path |
|
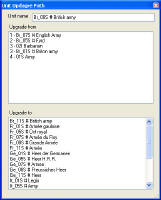
This function is a kind of bonus for the units. If you right click on the
Upgrade to dropdown list, you can select the Show upgrade path
command. It lists all the units that upgrade to the selected unit, directly
or not, and all the units the selected unit will upgrade to, directly or
not. |
 |
|
The advances page works in a similar way to the unit page. Only the
differences are explained here. So read the unit sections for general
commands! As information, the advances page indicates what civilization
can discover the advance. It means the advance doesn't require a non era
tech, or if it requires a non era tech, that the civilization has this tech
as bonus tech.
Also, the Advances page displays in red the flags which are always off
(i.e. no civilization has them on). They are in blue if several
civilizations have them, and in black if only one civilization has them.
Useful to check that "Enables bridges" has not been forgotten in your new
scenario!
Contrary to the regular editor, the "requirements - advances" dropdown
list will display only the advances which are from the same era. |
|
|
|
Editing the technologies |
|
Same principle as for units. Changing the era will reset the list of
advances which are possible requirements. A civilization cannot be a
requirement for itself. If you try to do this, an error message is displayed. |
|
|
|
Renaming a technology |
|
Same principle as for units. |
|
|
|
Sorting the technolobies |
|
Same principle as for units. |
|
|
|
Deleting technologies |
|
Same principle as for units. If a technology was a requirement, then the
requirement is removed. |
|
|
|
Adding technologies |
|
Same principle as for units. It is not possible to create copies of a
technology. Just new "default" technologies can be created. |
|
|
|
Copying technologies |
|
Technologies cannot be copied. However, it's possible to edit several
technologies simultaneously. |
|
|
|
Filtering technologies |
|
Same principle as for units, but the filter options are different. You can
notably limit the technologies to the one some civilizations can research;
or filter the technologies with an X,Y such that they would not be visible
in the science screen. |
 |
|
Changing the "creation" order |
|
Same principle as for units |
|
|
|
Checking for errors |
|
Same principle as for units, except the Civpedia and icon windows doesn't
display an ini file |
 |
|
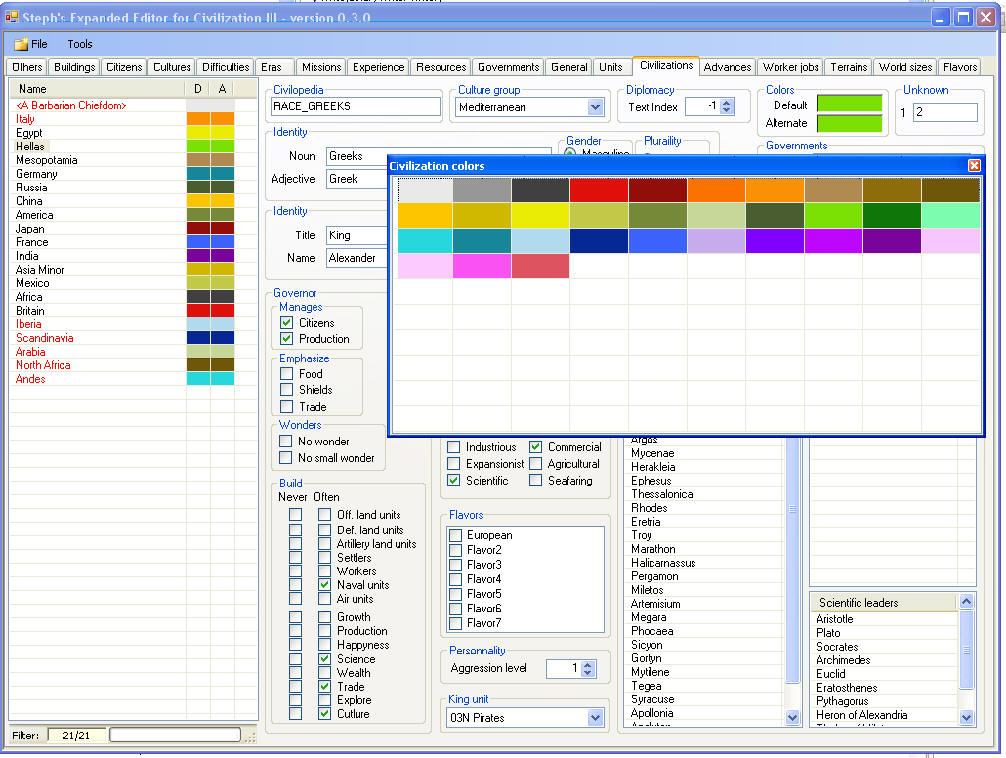
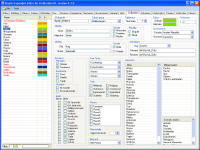
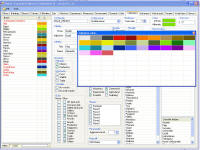
The civilization page works in a similar way to the unit page. Only the
differences are explained here. So read the unit sections for general
commands! The main list displays in two columns the colours of the
civilizations. |
|
|
|
Editing the civilizations |
|
Same principle as for units.
For the lists (Cities, Leader, Scientists)
- To add a new items, click on the last list (<Click to Add>), or press
the "+" key when an item is selected in the list.
- To delete items, select it, and press the Del key.
- To change a name, select it, and click again to edit (not a
double-click!)
Note: for the barbarian civ, it is not possible to add or delete items
form this list.
For the civilization colors, click on the colored rectangle (in the right
pannel). The color selection windows is opened. This windows shows the
colors sorting them by hue, and it can contains more than 32 colors. It's
build by getting the palettes from the ntpXX.pcx files. To get more colors,
add pcx files in the proper folder (like ntp32.pcx for instance). |
 |
|
Renaming a civilization |
|
Same principle as for units, except the first Civilization "Barbarian" will
always be displayed between < >. |
|
|
|
Sorting the civilization |
|
Same principle as for units, except the first Civilization (Barbarians) will
remain listed first. |
|
|
|
Deleting civilizations |
|
Same principle as for units, except the first Civilization (Barbarians)
cannot be deleted. Contrary to the regular editor, deleting a civilization
will not screw the units... The civilizations than can build each unit will
be preserved. |
|
|
|
Adding civilizations |
|
Same principle as for units, except the total number of civilizations,
including barbarians, is limited to 32. It is not possible to create copies
of a civilization. Just new "empty" civilizations can be created. |
|
|
|
Copying civilizations |
|
Civilizations cannot be copied. However, it's possible to edit several
civilizations simultaneously. |
|
|
|
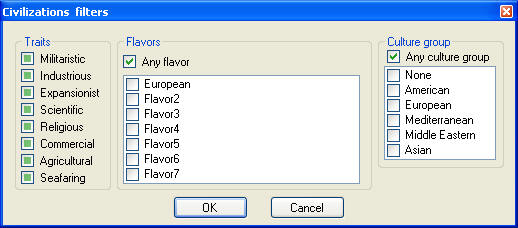
Filtering civilizations |
|
Same principle as for units, but the filter options are different. |
 |
|
Changing the "creation" order |
|
Same principle as for units, except the first civilization (barbarian) must
remain the first civilization, and cannot be moved. |
|
|
|
Checking for errors |
|
Same principle as for units, except the Civpedia and icon windows doesn't
display an ini file, but list the different pcx instead. |
 |